Template
Version: v1.0
Template
What is this main purpose
In this page, the user will define all the different templates for all the different types of documents that the user wants to automate in the system for data collection.
Furthermore, the user also has the possibility to manage all current templates that have been created.
Prerequisites
Before starting to create all the different templates, it is recommended to define all the data that shall be collected in your system. To do so, you shall go into the application settings and define all the data that shall be collected in your system. You can find more information in the the following section.
In addition, it is also recommended to define the type of user who has the permission to create or manage the application. More information in the "this" link.
Overview
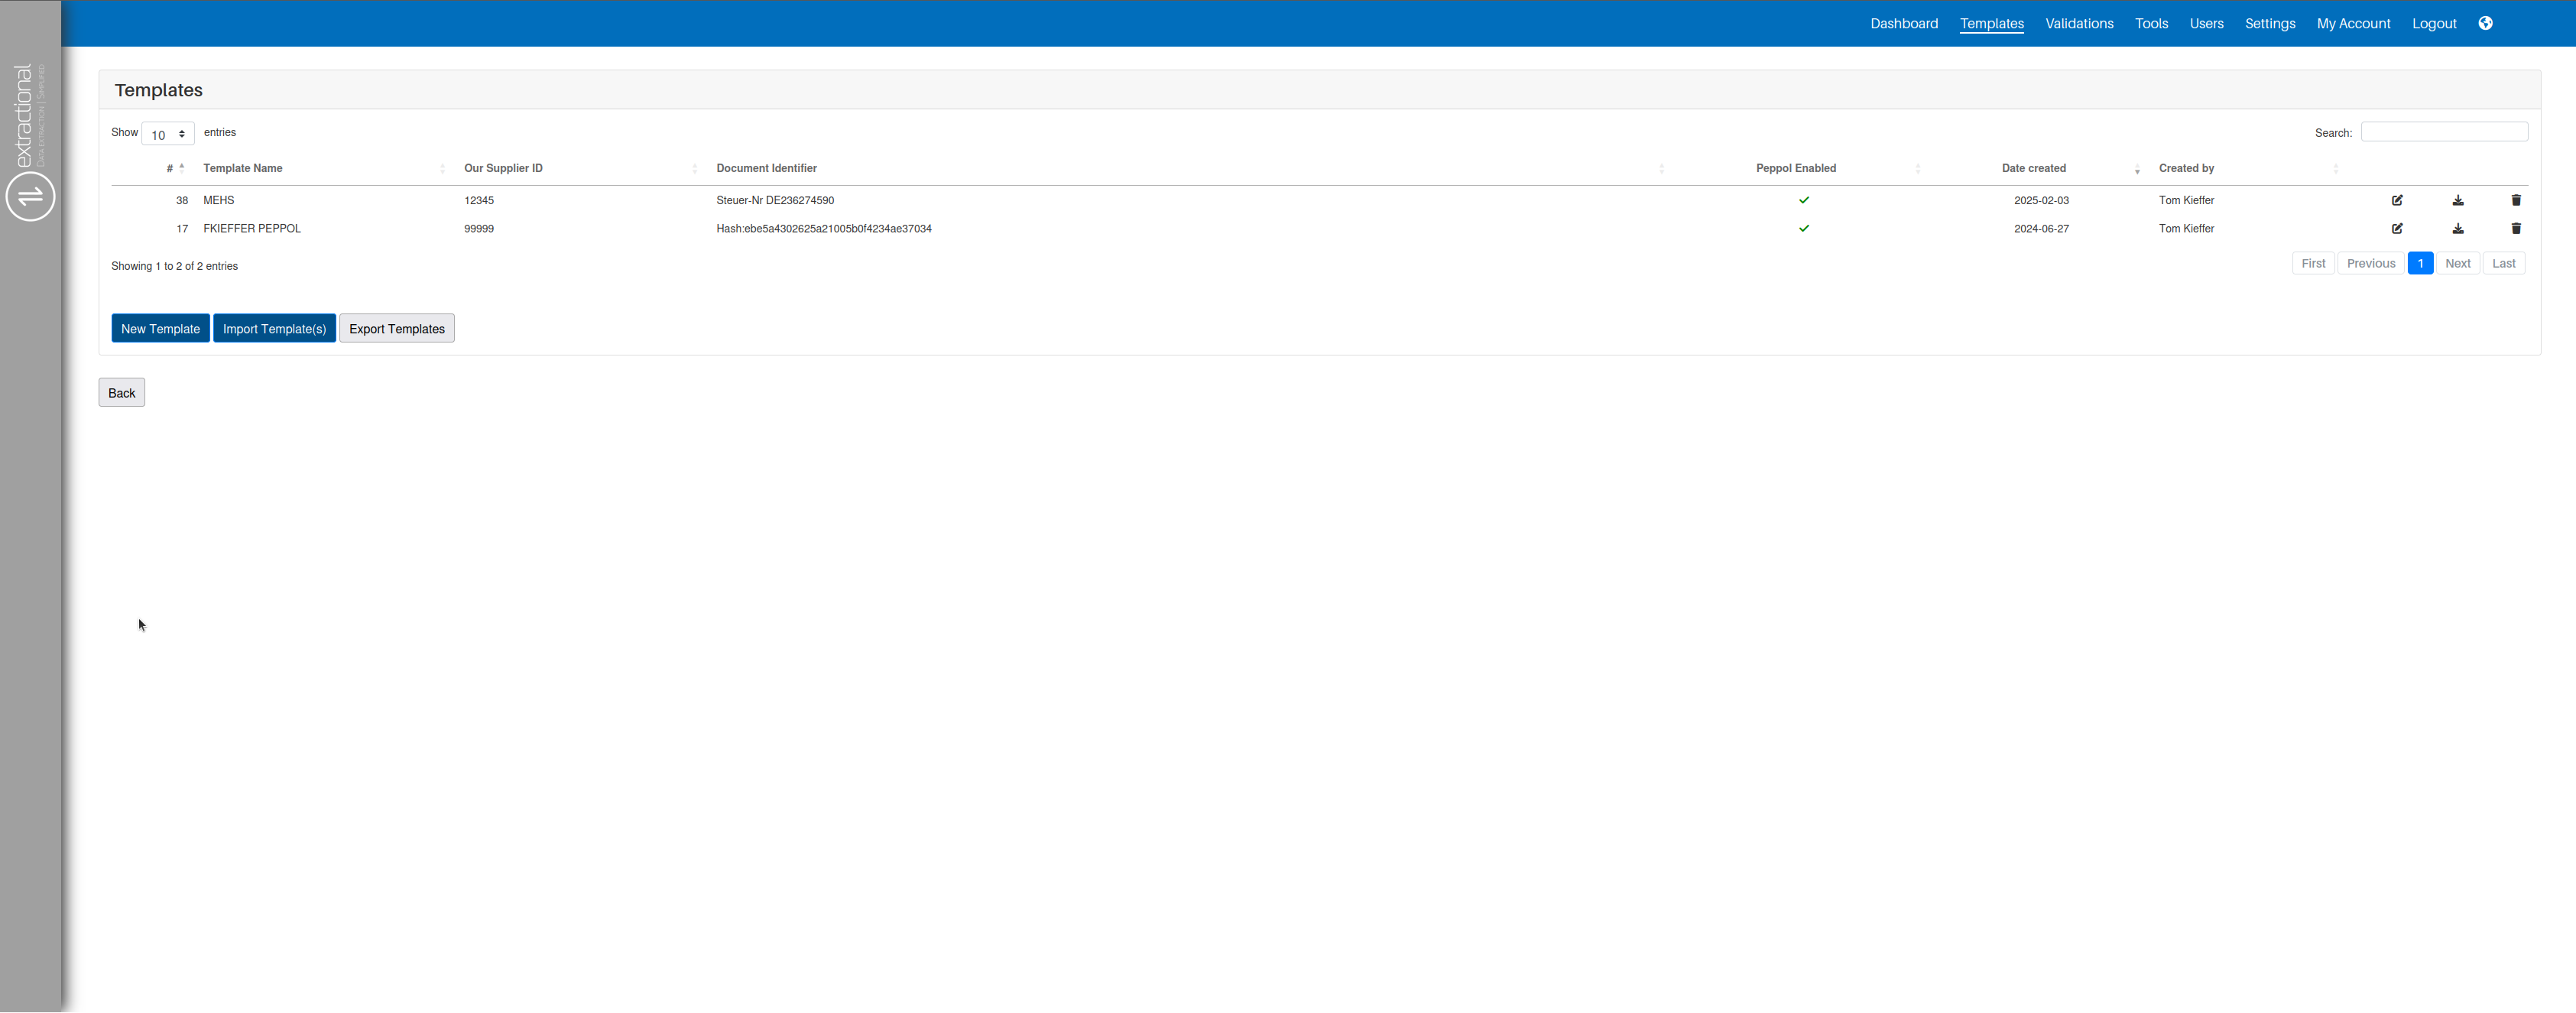
Functionalities overview
Adding a new template
In this part, you shall find a step-by-step guide on how to add a new template to your system.
Triggering the system
To trigger the system, it is as simple as clicking on the "New
Template" button. You will then be redirected to the following page:

Uploading a template file
During this part, you will upload a template file for the system to have
a base. You can do so by clicking the "Browse file" button in the top
left corner of the screen. After clicking on this button, you will be
redirected to the operating system's file selection tool to select the
desired template.
Once you have selected the file, you shall click on the "Upload"
button. The system will then upload the file and it will look something
like this:
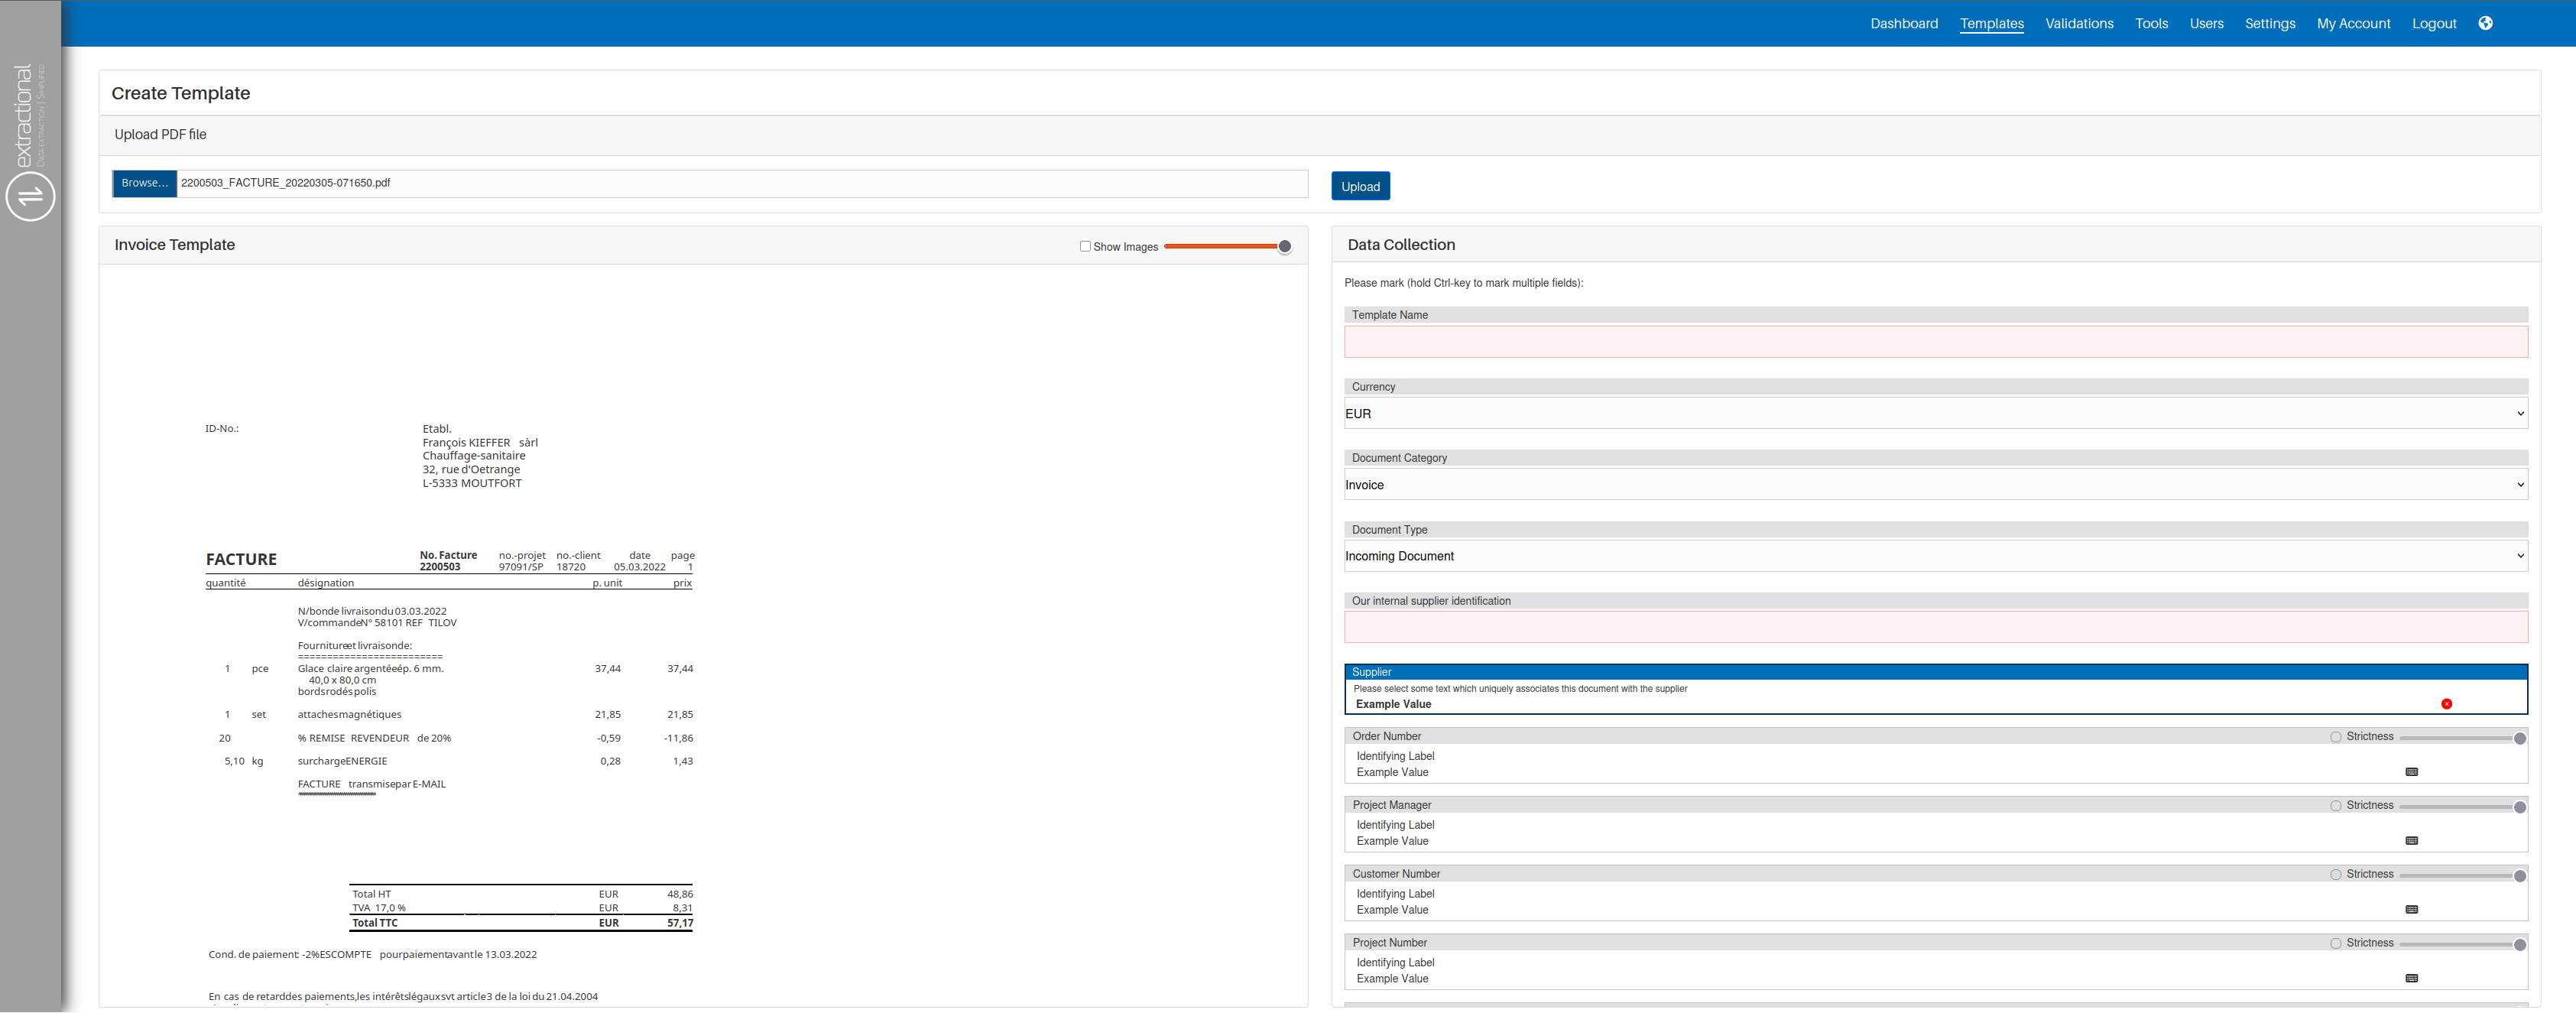
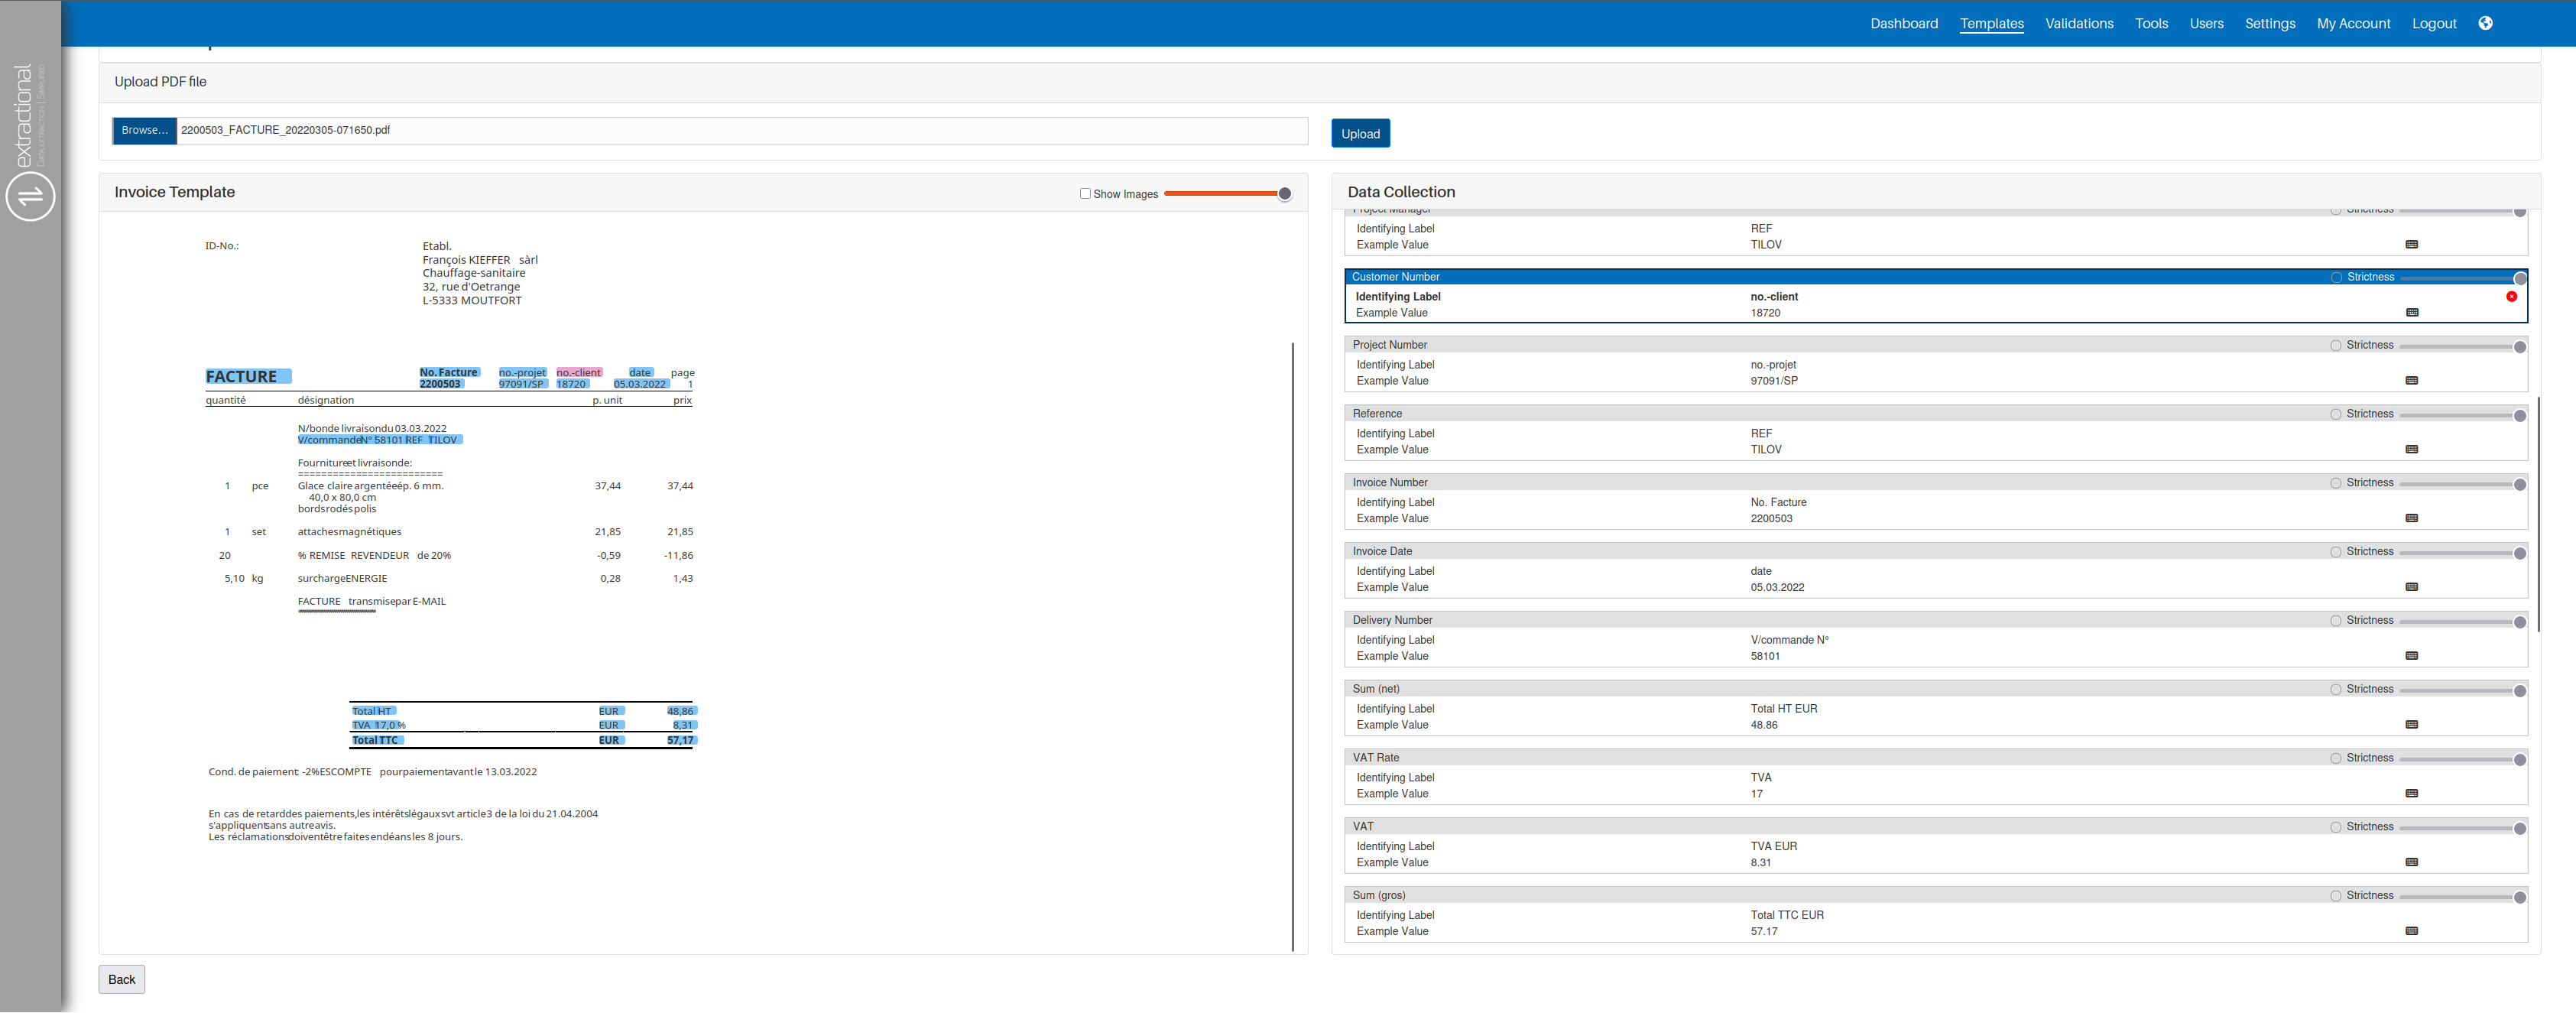
Defining all the different fields
This part of this process is the most time consuming and is also the most important. During this part, you will define all the different fields for future automation.
Before you start analysing the document, take into account that you can
always partially or completely remove all the pictures of a PDF. To do
this, use the checkbox "Show Images" to display all images in the
file. You can adjust the visibility at any time using the scrollbar
located directly after the "Show Images" field.
Important
You can use images in the different fields as values, such as for identification. The system will hash the image and save the hashed information. However, using pictures as identifiers has the risk that the template will not be recognized even if the image has changed by as little as one pixel. Therefore, we recommend using pictures as identification as the last option.
First of all, you shall define all the fields that will define the base properties of the template, such as template name, currency and document type.
Choosing a unique identifier
After that, you shall enter the field that will identify any document
to trigger this template to be used. We recommend always using a text or
value that will always be present in this company's type of document as
well as an identifier of what type of document it is (for example, using
the tax number of the company together with the indication that it is an
invoice). To select the field(s) that shall be used as identifiers, you
shall first click into the "Supplier box" and then click on the
field(s) that you would like to use as an identifier in the document. Be
aware that if you want to use multiple identifiers, you shall use hold
the "Ctrl" button and select all of the fields. Additionally, you can
also use images as identifiers to documents, but it shall be used as the
last option since companies do sometimes change their looks in their
documents.
There are two ways to define field automation: automated and manual insertion. All automated fields are the ones that the system shall identify in each invoice while the manual ones are the ones that are constants and will always be constant throughout all documents. We recommend defining all constants as manual fields to improve the consistency and efficiency of the system.
To define all the different automated fields and respective identifiers, you shall use the same technique as the one for the identification field but in this case, once for the data identification and the other for the data value. As for the manual fields, you shall first click on the keyboard button and then insert the respective value into the system. You can manually type the value or use the same technique as before.
Tip
How to define good candidates for "identifier"/"value" pairs:
-
The distance from the identifier to the value will not interfere the performance of the algorithm
-
You need to make sure that the identifier should always be present in the document, even if this requires using an identifier that is positioned within a larger distance from the actual value.
-
Always select the whole value and not part of it (apart from the description in line items).
In the end, your system shall look something like this:
Importing and exporting templates
If you would like to import the current templates to another system or send them to the support, you shall use this functionality.
Exporting Templates
To export templates, you only need to click on the "Export Templates"
button and the download of the zip file will start automatically. This
zip file will contain all the information of all templates that have
been created in your system.
Importing Templates
To import templates, you shall click on the "Import Template(s)"
button and choose the zip file containing all the templates previously
exported.
Additional buttons and functionalities
This part will consist of explaining all the additional buttons and how to use them.
Edit button

The edit button is responsible for triggering the system to edit a specific template. This button can be seen in each template and is visualized as the following icon:
Once you click on the following button for a specific template, you will enter the page where you can modify all the different fields in that template.
Delete button

The deletion button is responsible for deleting a specific template from your system. This button can also be seen in each template and is visualized as the following icon:
Important
Be aware that if a template is deleted, validations created with it will not lose their extracted data. This is because the template is only used during the extraction process, after which all data is stored independently.
Peppol Enabled Checkbox
In this column of the table, you will be able to click understand if a certain template does extract all Line items of the document or not.
All checked templates will extract the envelope data and all line items of this type of document while one that is not Peppol enabled will only extract the envelope data of the respective file.