Main functionalities
Version: v2.0
Main Functionalities Overview
Creating a new validation
In this part, we will explain how a validation can be created. Additionally, we highly recommend having a dedicated e-mail directly connected to the system, since this will save your company a considerate amount of time.
Reading from an e-mail inbox
Automation via email is set on the settings page; if you want more information about this feature, please click the following link.
Manual insertion
In this part, you shall find a step-by-step guide on how to manually insert a new validation in the system.
The first step will be to trigger the system to know that you want to add a new validation. This can be easily done by clicking on the new validation button. This button can be seen on the bottom left corner of the Validation page.
Once you have clicked the new validation button, you should be presented with a new page that should look like this:
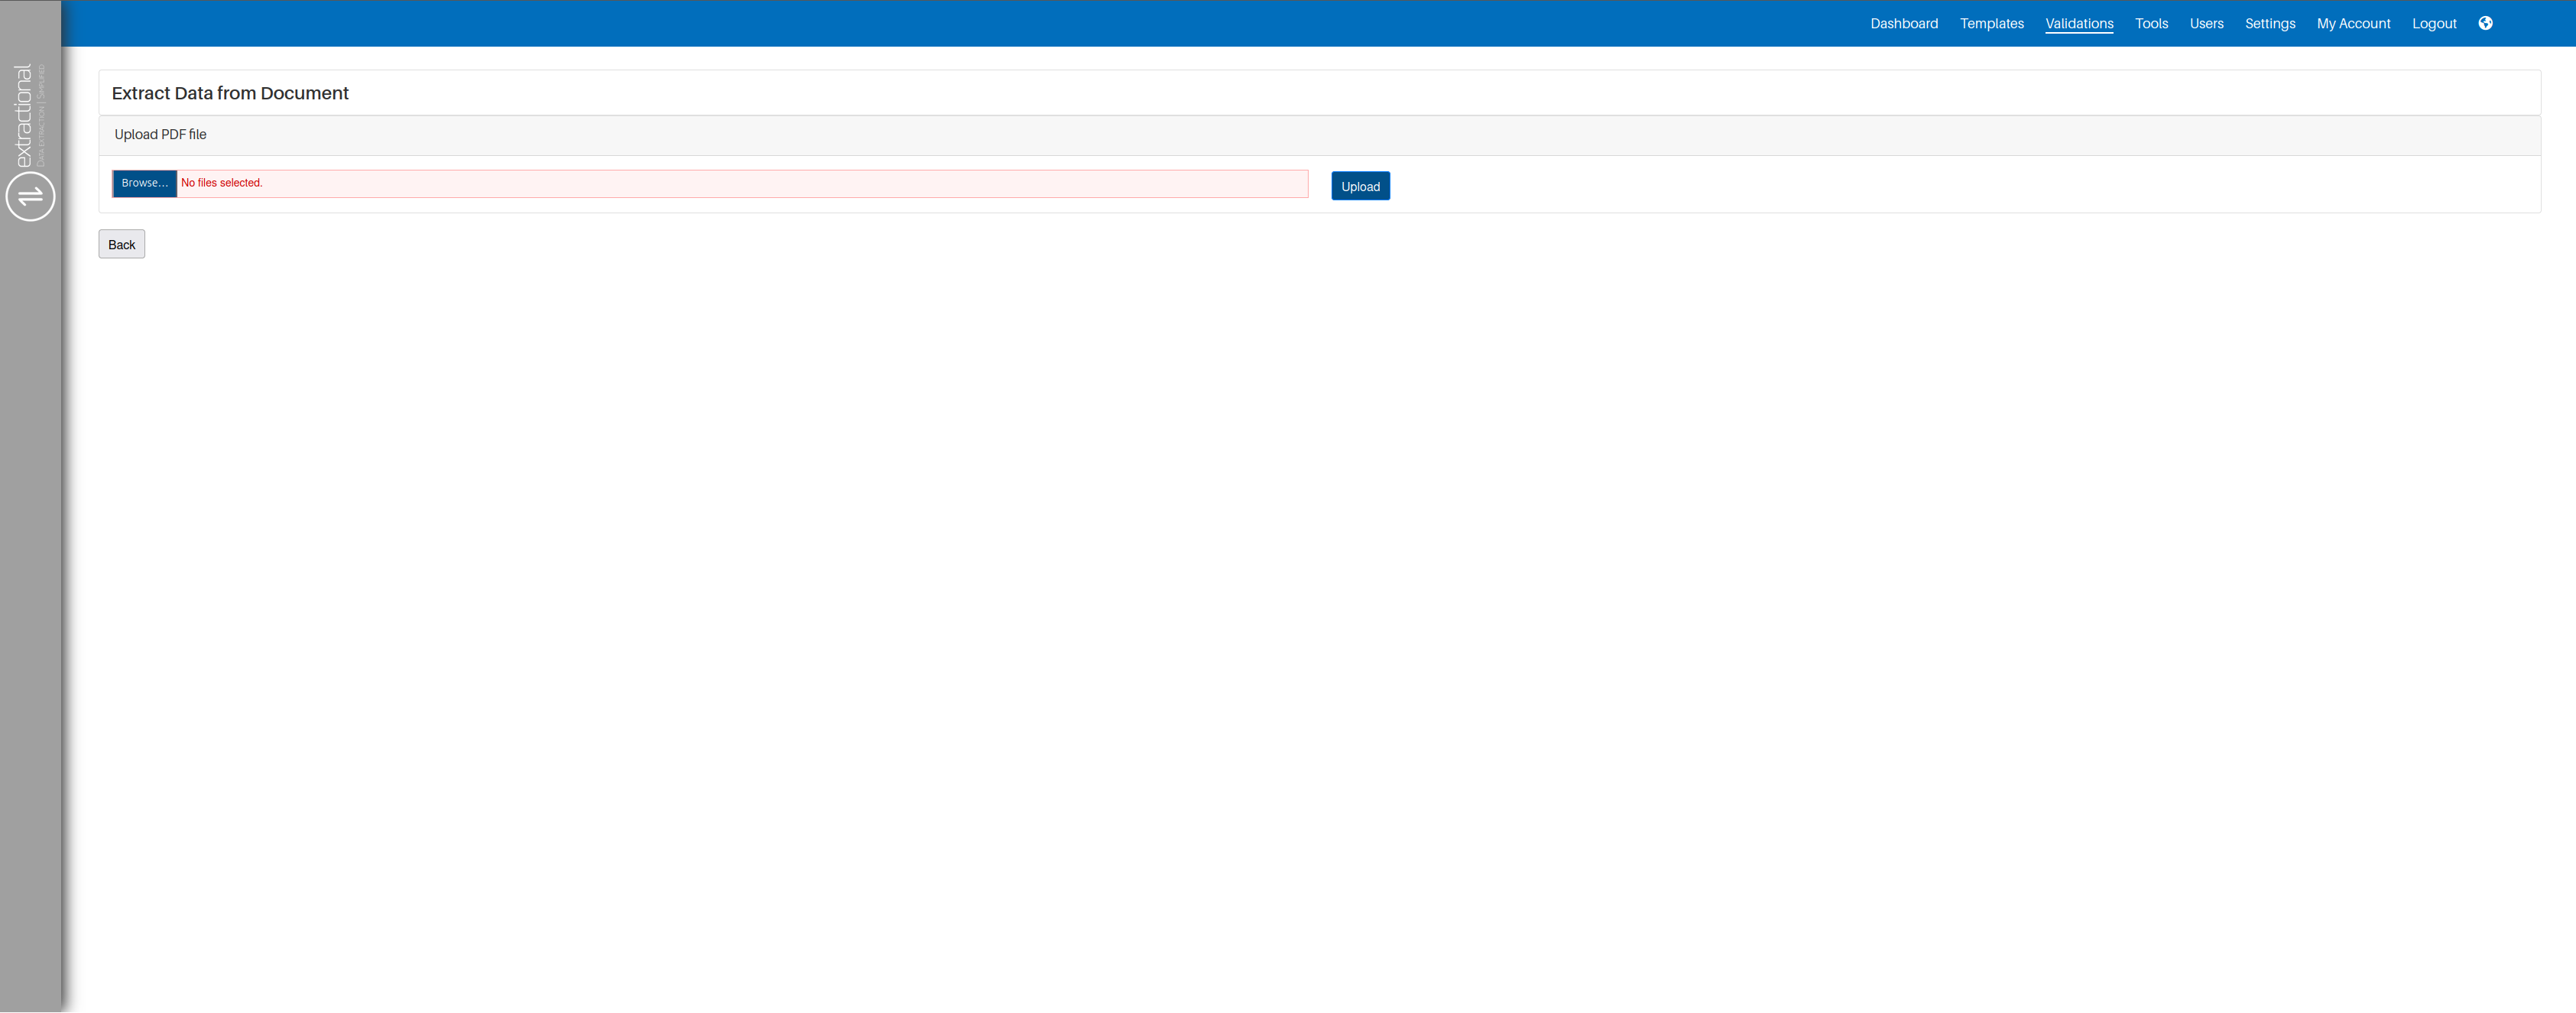
The second step will then be to select the file(s) that you want to
upload to the system. This can be easily done by clicking the
Browse\... button and using your operating system's file-selection
dialog to choose the file.
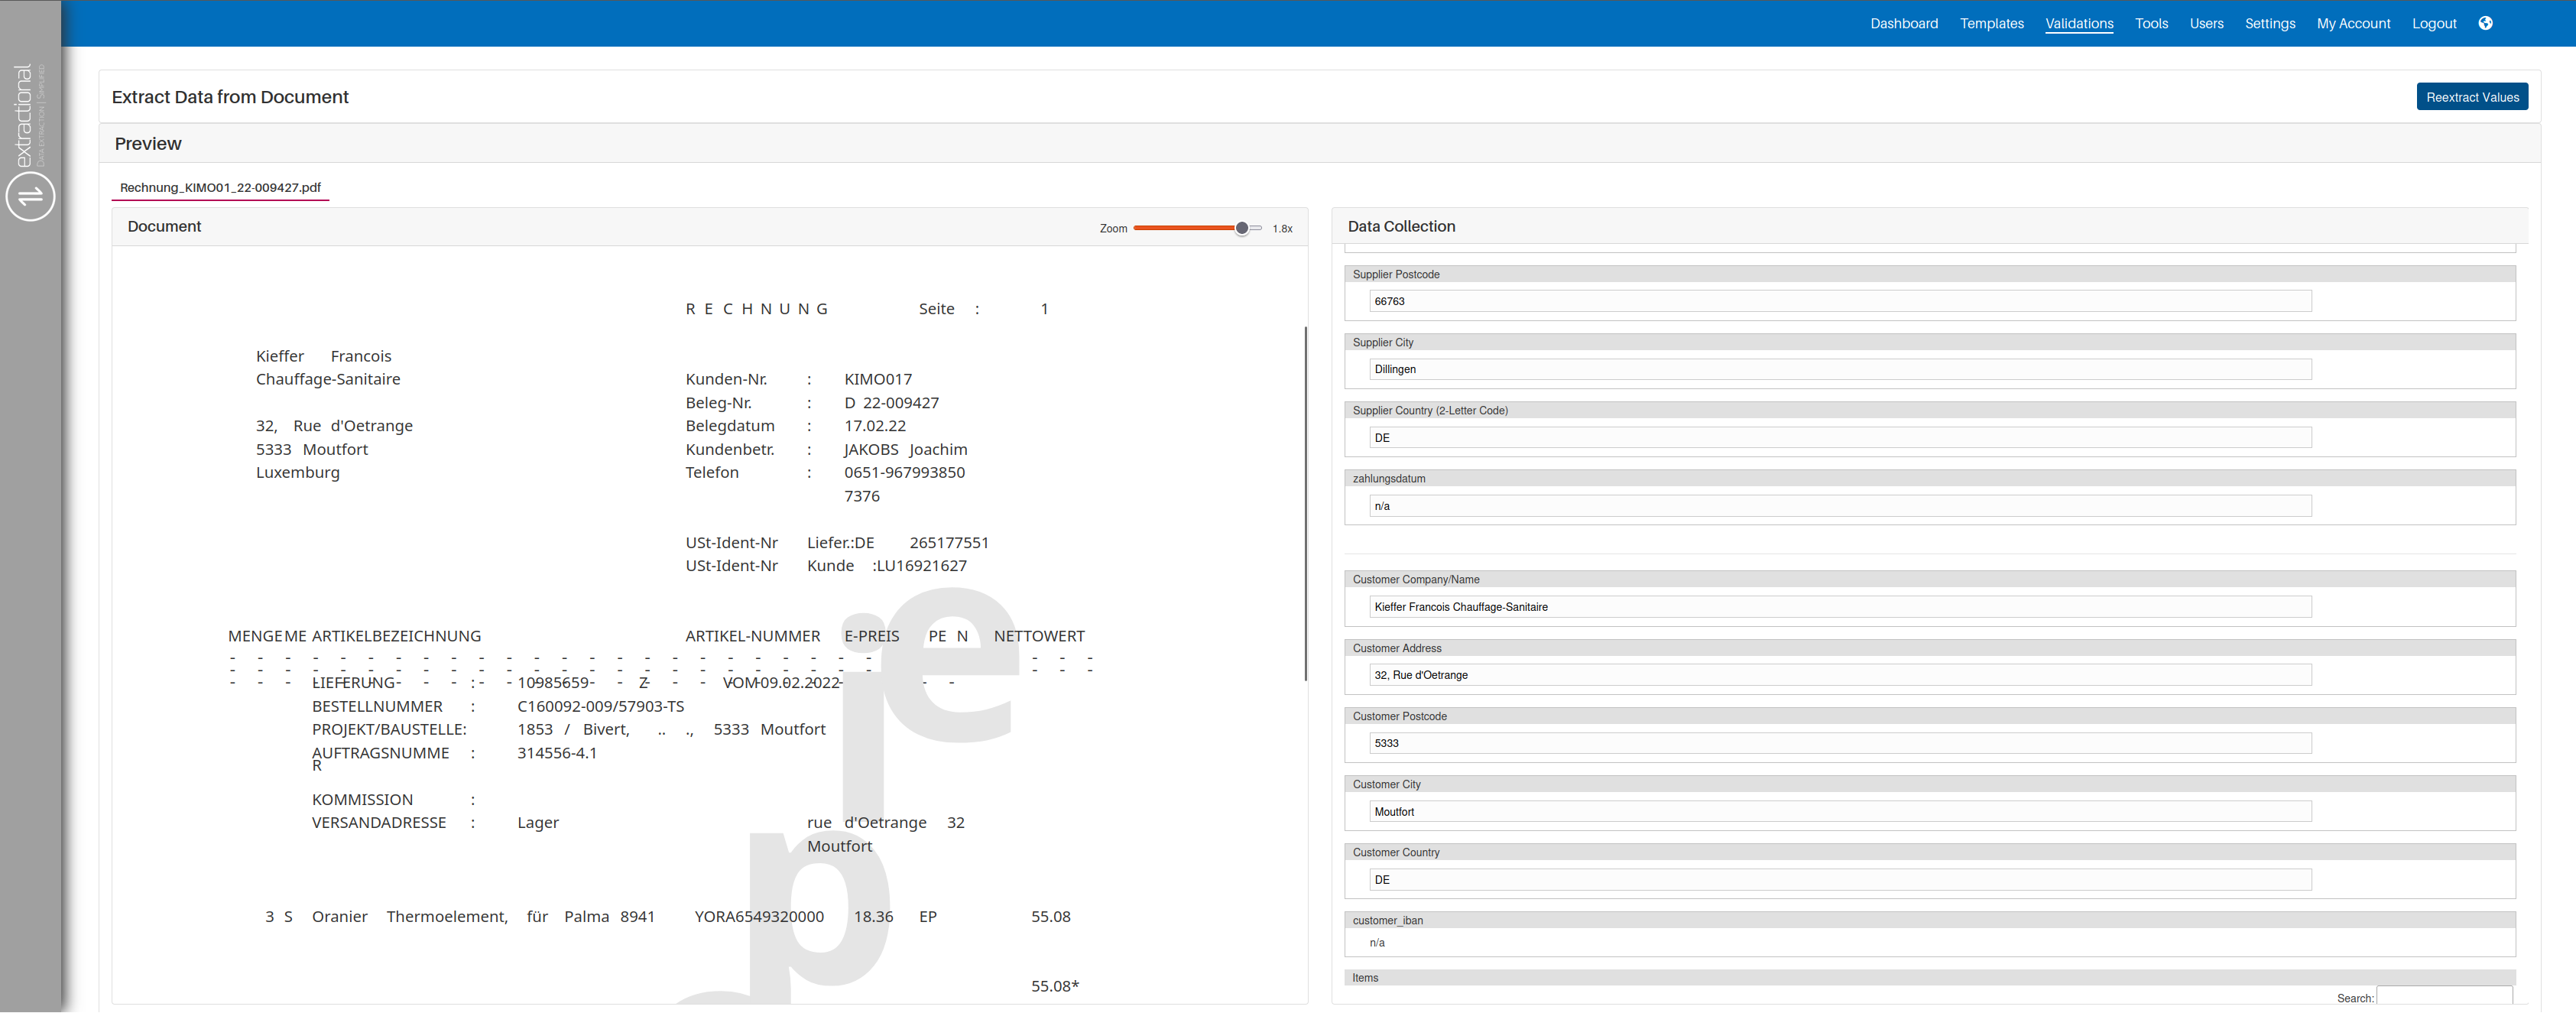
After having chosen the desired file(s) to upload, you can upload the file into the system by clicking the \"upload\" button. Once you have clicked this button, the system will look something like this:
Important
The third and final step will be to verify all the entries in the Data Collection section of the page. Here we have a few recommendations that you should take into account:
- Add any notes that might be helpful for the others in the future.
- Please complete and verify all the respective fields; usually most of the validations that will be created will automatically have all the values correctly extracted but we always recommend checking all the fields to possibly filling or correcting some of the values.
Once you have achieved to do all the different steps, save the validation.
Note
To save the validation, you will need to click on the "Save values" button, which can be seen in the bottom left corner of the Data collection window.
Additionally, to go back to the main validation page, you only need to
click on the back button found in the bottom left corner of the
page.
Changing the state of teh document
How to release a document step-by-step
In the following paragraphs, you will find a step-by-step guide on how to properly release a document.
The first step in this process will be to open a new validation that is
still not released, if you still need to create this new validation,
please go back to the Creating a new validation
chapter that shows how to create a new
validation. In addition, to open an existing validation, you will need
to click on the validation number on the desired validation.
The second and most important step in this process is to verify all the entries in the Data Collection window. If you wish to change any values in the Data Collection part, you will need to click on the desired field first and change the value by right-clicking the correct value on the file or you can also manually type the correct value.
Important
You will only be able to correct the values if the field is set to allow manual changes. For more information, please consult the Settings page
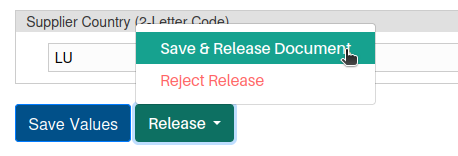
Once you have finished verifying all the data from the data collection window, you can now decide to witch state the document shall be set to.
This can be done by clicking on the Release button followed by choosing the desired state.